Build overview
The following sections give an overview of important build time concepts in Genesis applications.
Genesis applications are built using gradle. The web client commands are wrapped with gradle commands to allow the easy build of a full stack application using a single gradle task.
Full application build
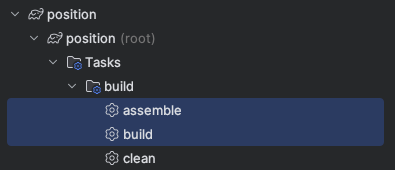
Genesis provides gradle tasks at the project root level which will trigger a build of the full-stack application.
assemblewill build the full project, but not run any testsbuildwill build the full project and run any unit tests specified

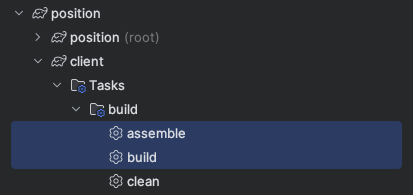
Client build
To build the client project, within the project's client directory you can run assemble (skips tests) or build (runs tests) to build the back end of your genesis application. These tasks rap npm build tasks in the client/package.json file.

package.json
The package.json file is auto-generated for you by the CLI, based on your answers to the prompts.
At the top you'll find the name and description of your application.
Following this, there are three key sections you need to be aware of:
- config
- scripts
- dependencies
Config
When running the app on your local machine, you can adjust a few settings under the config section, including which host to connect to and what port to run the dev server on.
"config": {
    "API_HOST": "wss://dev-position2/gwf/",
    "DEFAULT_USER": "admin",
    "DEFAULT_PASSWORD": "genesis",
    "PORT": 6060
  },
Scripts
The next section is scripts.
Some have been auto-generated for you; feel free to add your own scripts, as needed.
These are the commands that you invoke with $ npm run - when you execute that command from your command line, node will look at the scripts listed here to know what to run.
For example, $ npm run clean:dist will run node ../.build/clean.js dist.
  "scripts": {
    "build": "npm run build:webpack",
    "build:with-host": "cross-env API_HOST=$npm_package_config_API_HOST npm run build:webpack",
    "build:webpack": "cross-env NODE_ENV=production AUTO_CONNECT=true webpack",
    "clean": "npm run clean:dist",
    "clean:dist": "node ../.build/clean.js dist",
    "copy-files": "copyfiles -u 1 src/**/*.{css,scss,ttf} ./dist/esm",
    "dev": "npm run dev:webpack",
    "dev:webpack": "cross-env API_HOST=$npm_package_config_API_HOST AUTO_CONNECT=true DEFAULT_USER=$npm_package_config_DEFAULT_USER DEFAULT_PASSWORD=$npm_package_config_DEFAULT_PASSWORD NODE_ENV=development webpack serve --open",
    "serve": "serve dist -p $npm_package_config_PORT",
    "test": "echo \"Error: no test specified\""
  },
Your settings from the config block are passed to different scripts as environment variables, using cross-env. So, for example, if you want to add a new config for a DEFAULT_VIEW:
- add the config to the config block as
"DEFAULT_VIEW": "reporting" - in the npm script that requires the variable, add
DEFAULT_VIEW=$npm_package_config_DEFAULT_VIEW.
Server build
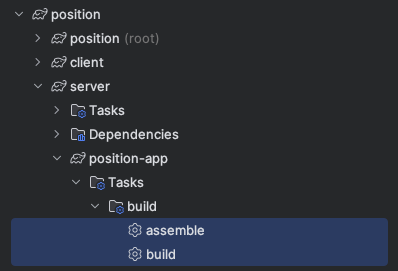
To build the server project, within the project's server directory you can run assemble (skips tests) or build (runs tests) to build the back end of your genesis application.

DAO
The system definition, fields, tables and views you define generate DAOs (Database Access Objects).
There are five hierarchical levels:
- System Definition
- Fields
- Tables
- Views
Each layer can reference the layers above in the hierarchy, so for example, tables can reference system definition items, and views can use table items.
These objects must be built with your project, they are generated into application jars and can then be used by the other parts of your code. Whenever you edit any of these definitions you should rebuild the DAOs to start referencing them in your code.
Building
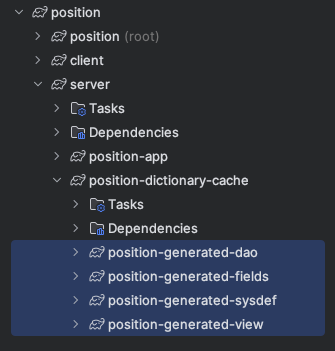
If you use intelliJ's gradle option, you have a project with a project_name-dictionary-cache submodule. This contains the tasks for generating Genesis DAOs.

Each of the following has a sub-menu that takes you to the assemble build task:
Commands for DAO generation
| Dao Type | Gradle Task |
|---|---|
| System Definition | genesis-generated-sysdef |
| Fields | genesis-generated-fields |
| Tables | genesis-generated-dao |
| Views | genesis-generated-view |
Bundling generated code with product distribution
You can bundle the generated code with the product distribution. This shortens the deployment time, because remap skips the code-generation step.
To do this, you must do two things:
- When you build the distribution, set the following gradle property to
true:
bundleGeneratedClasses=true
- Set the
DEPLOYED_PRODUCTSystem Definition property. You can read more about that here.
Troubleshooting
Gradle build errors in project and no gradle commands listed in IntelliJ
If you don't see any menu options per the guide above, and you see gradle errors when you try to build or open a project, a common cause is gradle JVM settings.
In IntelliJ. go to File -> Settings and search for the Build Gradle page. Make sure Gradle JVM is set to the correct JDK version used by Genesis. You should set this to 17.