Reporting - User guide
This page provides an overview of how to use the reporting module. It is intended for users configuring and running reports. Developers should refer to the reporting developer guide.
This guide gives a high-level overview. Tooltips are available throughout the reporting module UI to give additional context for specific elements.
Accessing the reporting module
Click Reporting in the application header to open the module. It is included in the header by default.
![]()
If you can't see this in your application, it is likely that your user needs to be granted the correct access permissions or that the component needs to be installed (which developers can add following the Developer guide setup instructions).
Access permissions
The following tables shows the permission codes associated with the reporting component functionality listed in this User Guide. If you are unable to see or use parts of the Reporting component in your application, speak to an application administrator who will be able to provide access.
| Functional group | Permission Code | Description |
|---|---|---|
| Report Configuration | ReportConfigurationView | View report configurations (both the overall list and the individual configuration), but not delete, edit, or create them. |
| Report Configuration | ReportConfigurationUpdate | Create and update report configurations. With this disabled but ReportConfigurationView enabled, a user can open a report configuration but they can't interact with the form or save any changes. Requires ReportConfigurationView. |
| Report Configuration | ReportConfigurationDelete | Delete report configurations. Requires ReportConfigurationView. |
| Report Generation | ReportRun | Execute an existing report config, and view generated reports (even if ReportView isn't enabled). |
| Report Generation | ReportView | View generated reports. |
| Report Generation | ReportDelete | Delete generated reports. Requires ReportRun or ReportView. |
| Report Destination Configuration | ReportDestinationView | View report destinations, but not delete, edit, or create them. If the user has ReportConfigurationUpdate but not ReportDestinationView then they can't view or select them when configuring a report. |
| Report Destination Configuration | ReportDestinationUpdate | Create and edit report destinations. Requires ReportDestinationView. |
| Report Destination Configuration | ReportDestinationDelete | Delete report destinations. Requires ReportDestinationView. |
User context for report execution
When a report runs, it uses the permissions of a specific user:
- Run button: The user who manually triggered the report from the Run Configuration screen.
- Scheduled run: The user who last edited the report configuration.
This is important because report data sources may have user-specific authorization rules. For example, if a report uses Orders data, it may be set up in such a way that a user may only see rows related to Counterparties they’re authorized to view. Any reports run as this user will only contain data that user is permitted to see.
If you notice missing or unexpected data, this is often the reason. If you're unsure about the authorization setup, speak to a developer who can check the data source configuration.
Report configuration
This is the landing section when opening the reporting module. It lists all configured reports in the application.
Click Add new report to create a new report configuration. Details on using the editor are in report configuration editor.

Each report listed has an ellipsis button offering the following actions:
- Run: Execute the report with its current configuration.
- Edit: Open the report in the configuration editor to make changes. See report configuration editor.
- Delete: Permanently delete the report configuration.
- Clone: Opens a modal dialog, allowing the user to clone the reporting configuration while configuring a report and filename that don't clash with the existing configuration.
Report configuration editor
Use the configuration editor to create or update report setups.
A stepper at the top guides you through each configuration stage.
- Save and Close: Saves the current report configuration (even if incomplete) and exits.
- Discard changes: Exits without saving. For a new report, this will discard all progress.
Use the Next and Back buttons to step forwards and back through the report configuration editor.
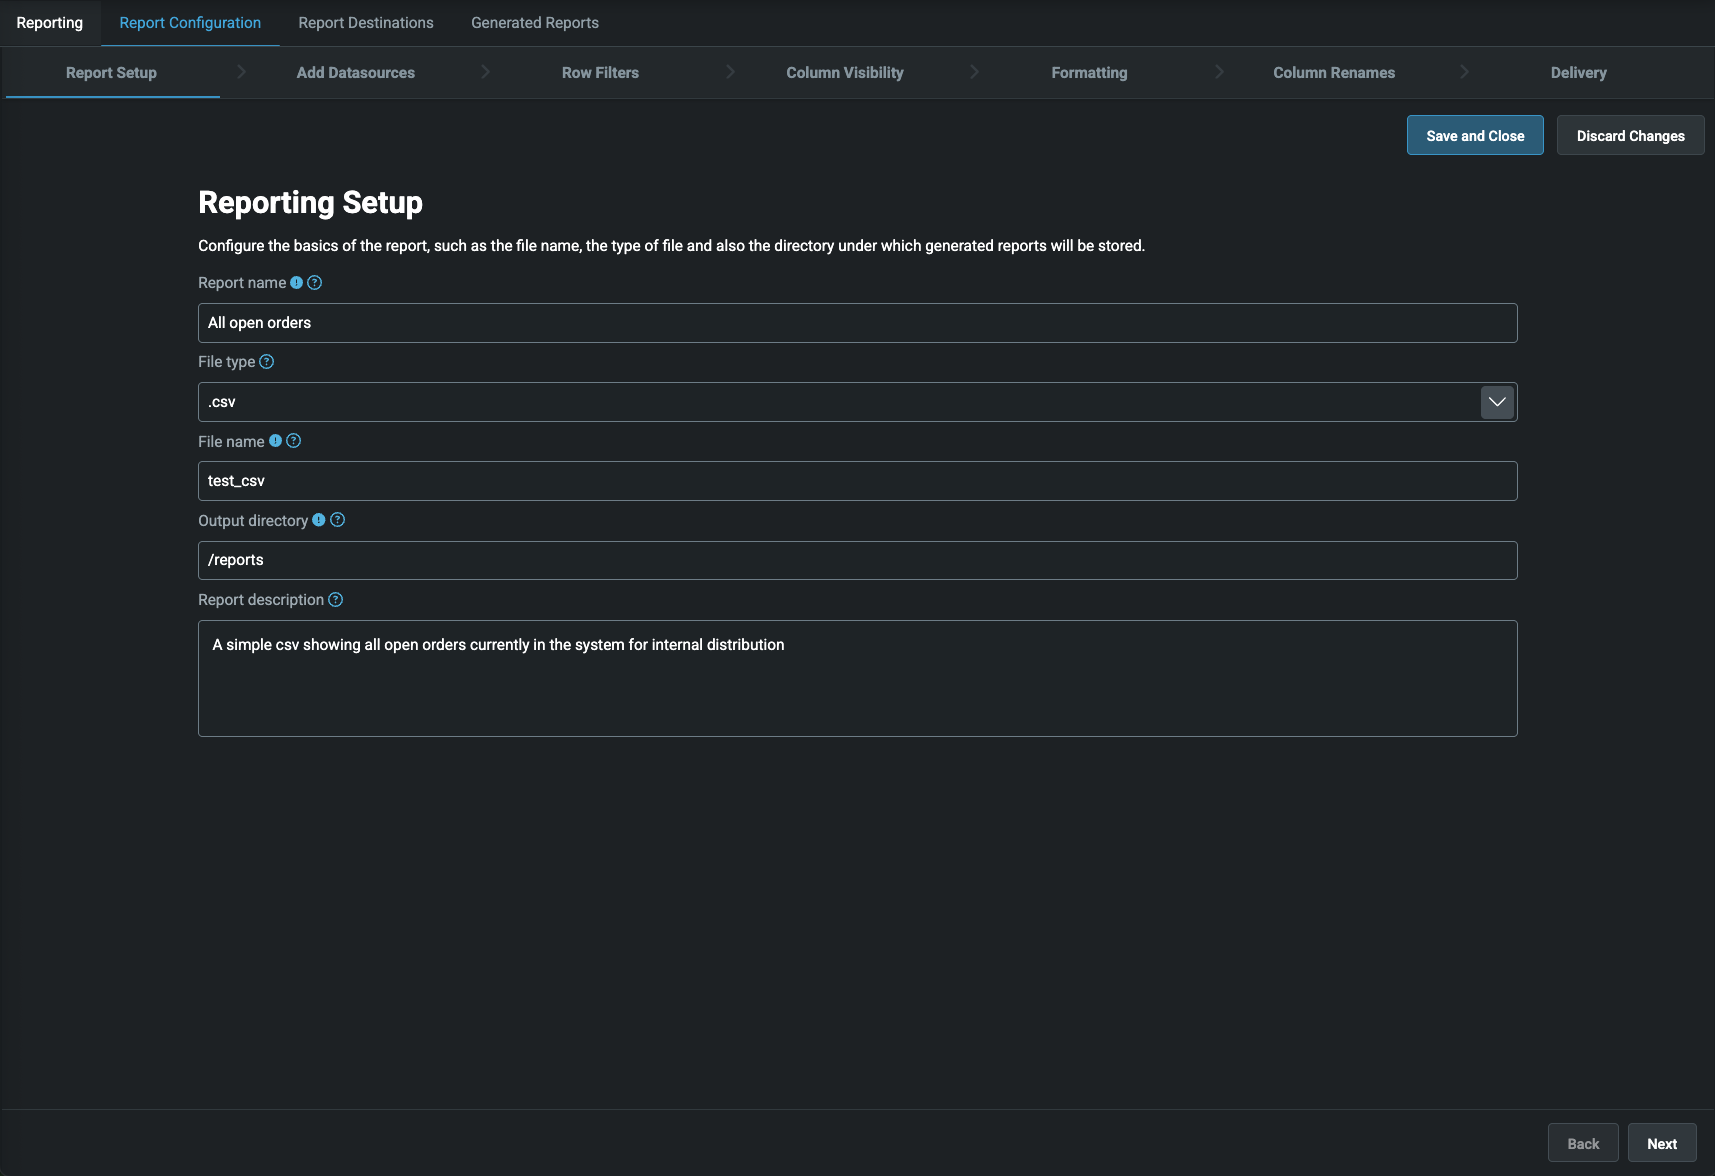
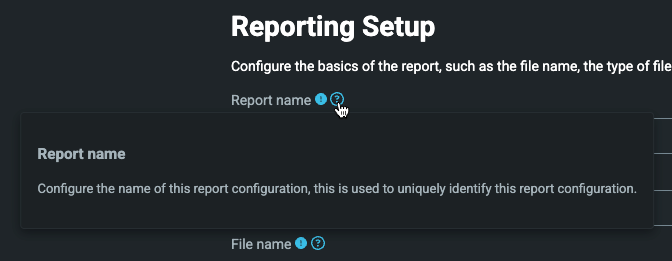
Report setup
The first page of setup requires you to:
- Provide a unique name for the report.
- Select a File type (CSV, Excel, or PDF).
- Specify a File name for generated files.
- Choose an Output directory under which reports that are generated will be placed within the Document Manager.
You can optionally add a full description for the report.
Templated reports
If creating a templated report (PDF or Excel), select a file template. The dropdown will show available templates in the Document Manager (a separate component, find it in the header) marked as "Document Template"
For PDF reports, selecting a template is mandatory.
Here you can see how you can upload a template using the Document Manager:
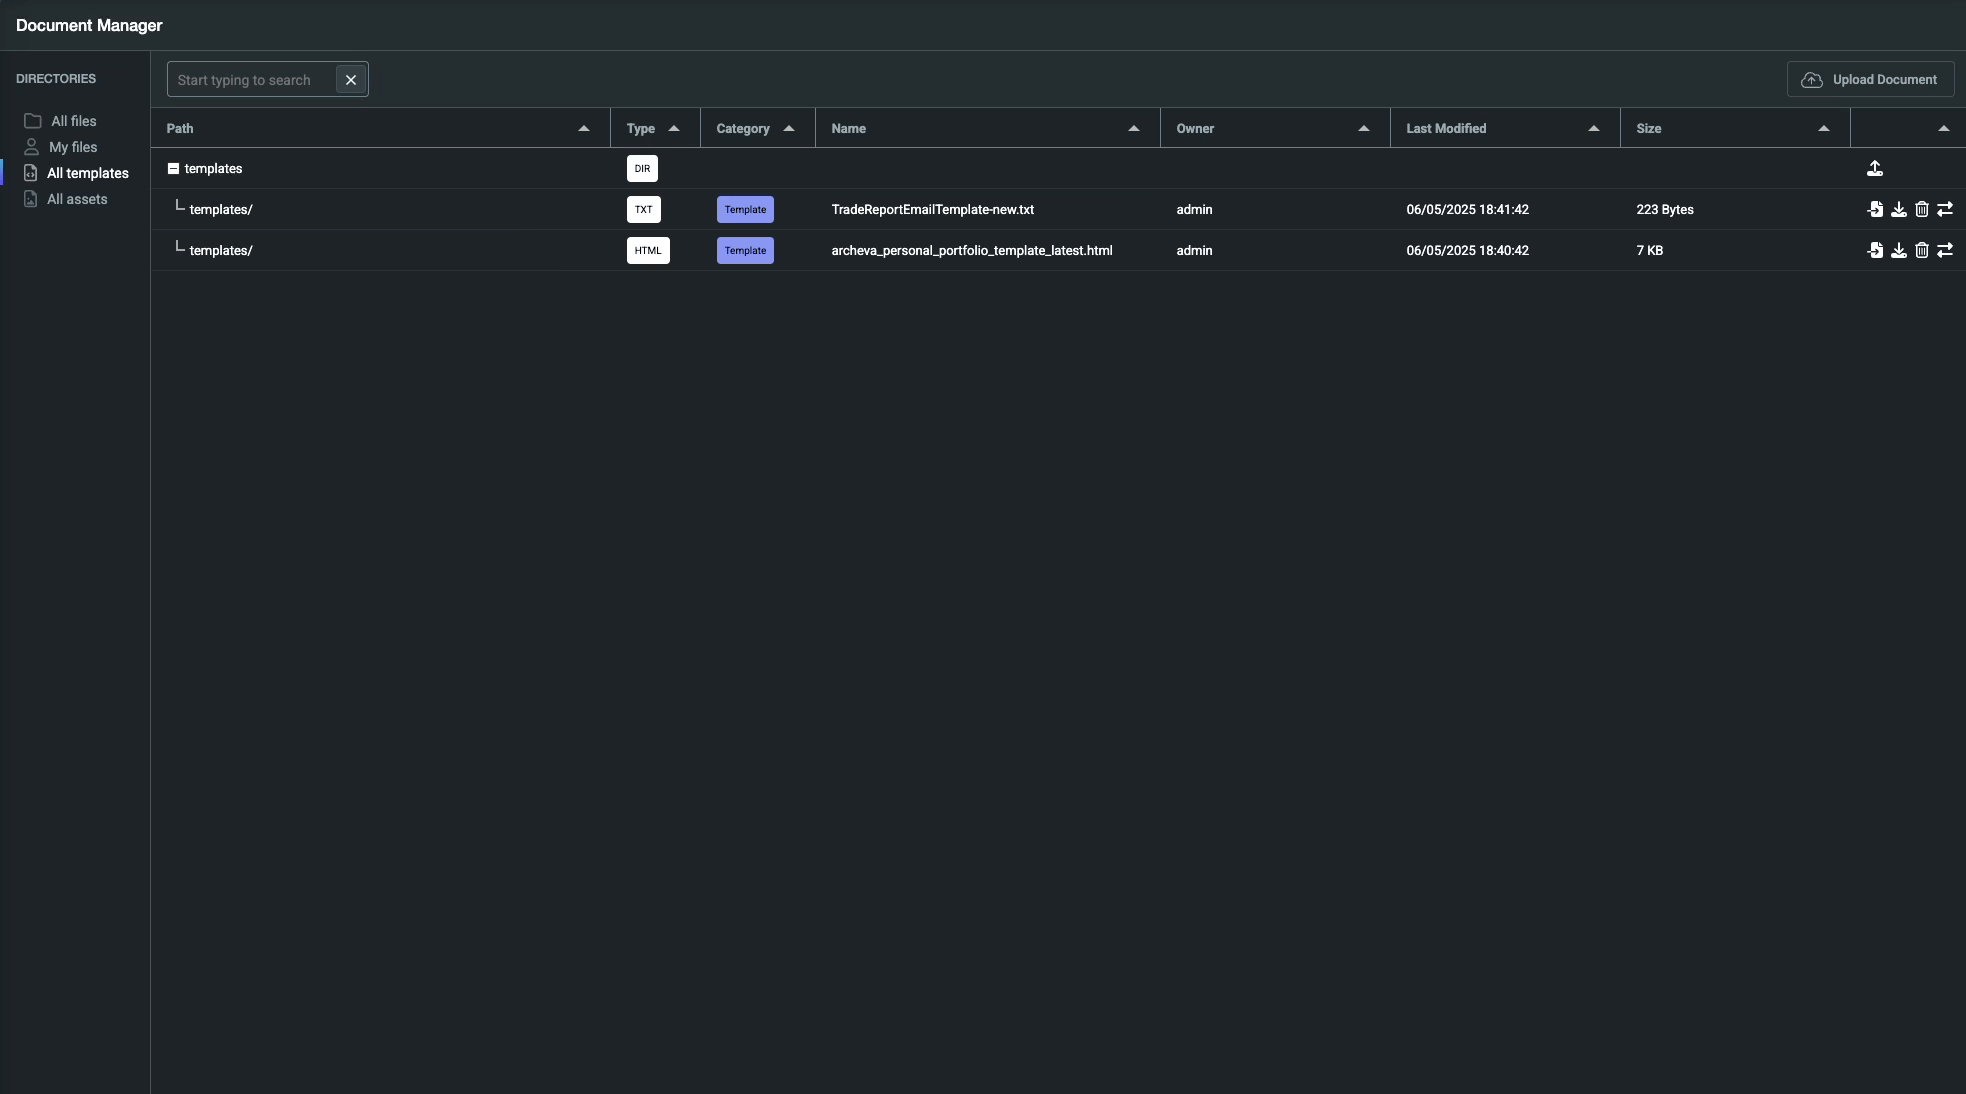
Templated reports can also reference assets, such as logos or images, which must be linked to the selected template in Document Manager by selecting "Link Assets" on the template you wish to link them to.
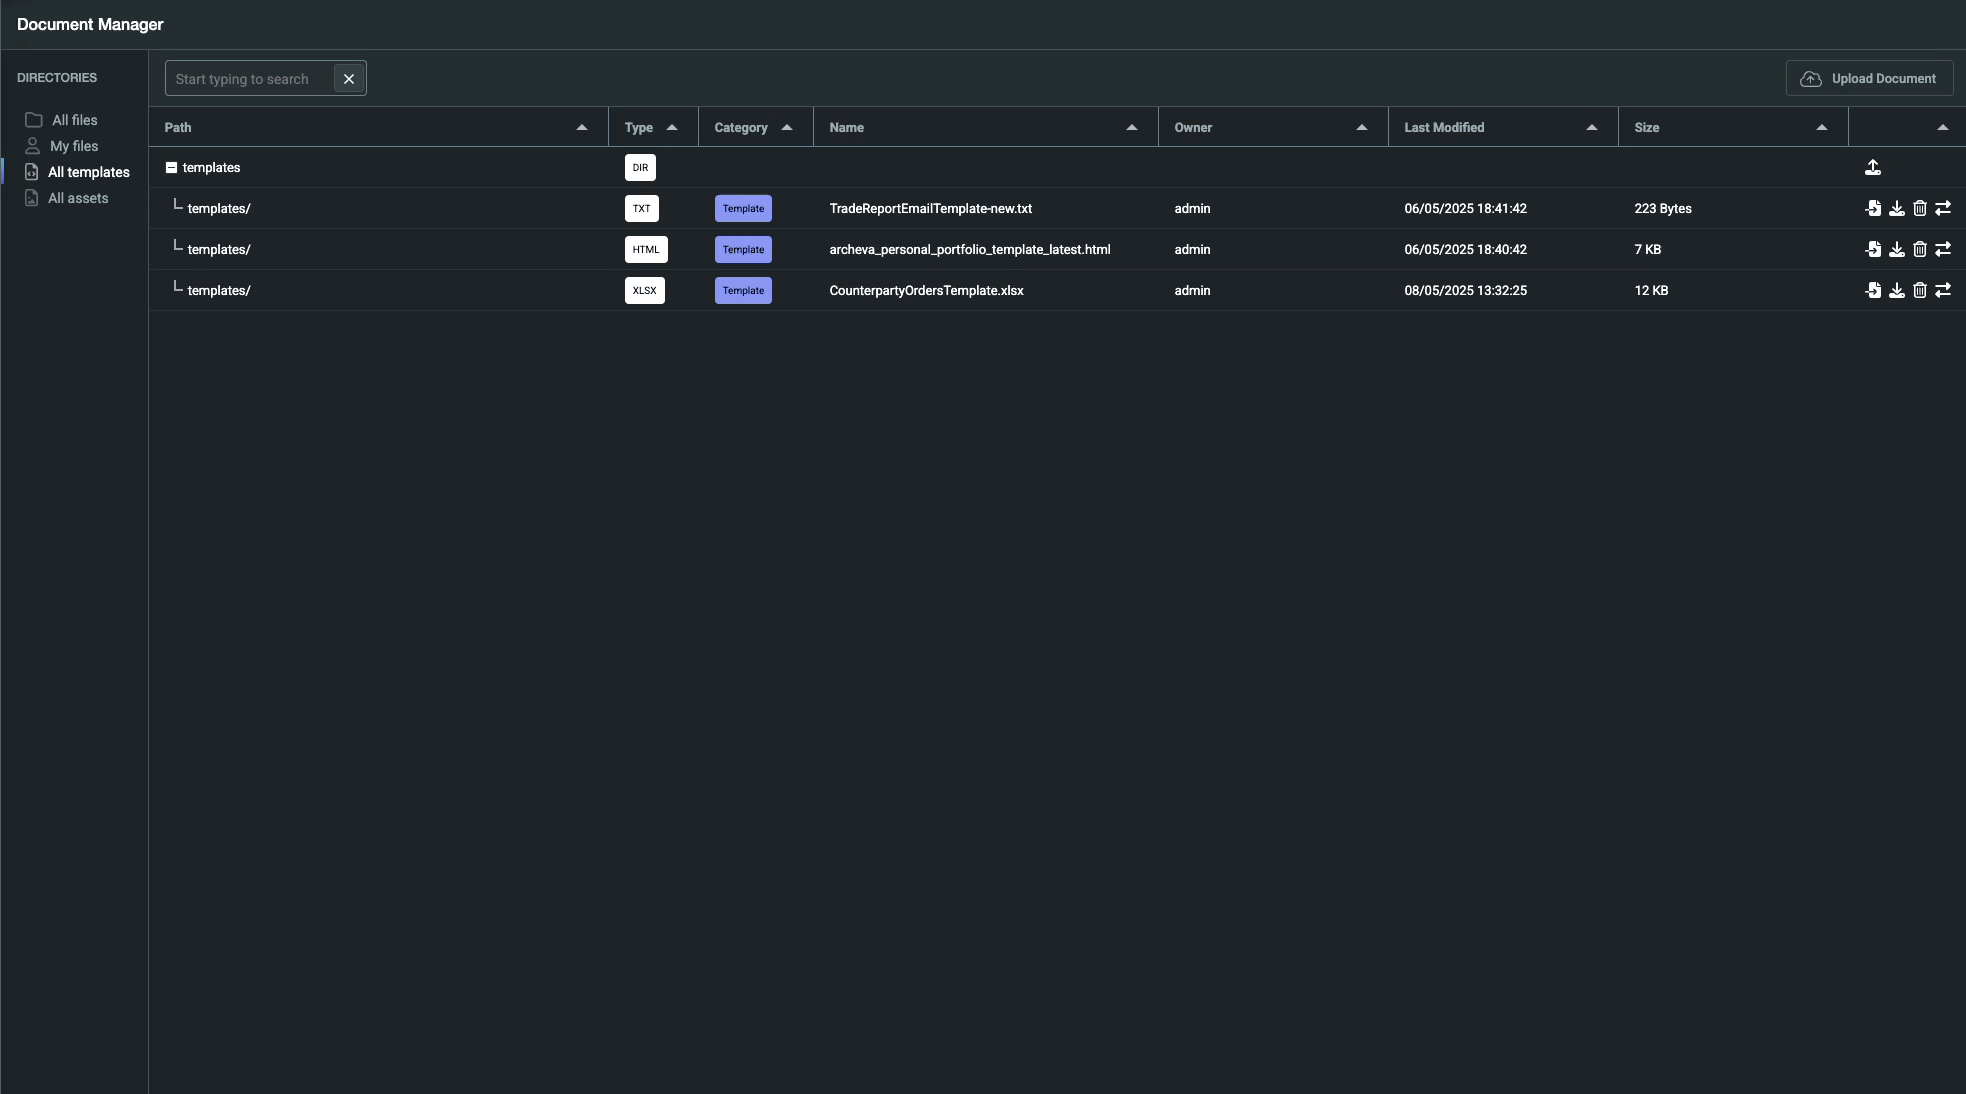
Only documents marked as Template Asset are available to select. Assets will need to be uploaded first, in the same way as templates are but with the file type in the top right instead set to TEMPLATE_ASSET.
The Document Generator component developer guide provides an example of how to reference data in templates. With the reporting engine you do not need to worry around the code elements in it's examples, but the templating guidance can help. An important consideration is that where used,
column aliases need to be referenced in the template, not the true UPPERCASE_FORMATTED field name - which must be used where column aliases have not been set.
Add datasources
Select data sources for the report:
- Simple types like CSV support one datasource.
- Complex types like PDF and Excel can use multiple datasources.
If you can't find a data source that you wish to use in your report, speak to a developer and request it is added to the REPORTING_DATASOURCE_LIST. If none exists they may need to create a request server onto the required table or view.
Row filters
Apply filters to limit data included in the report. For example, you could restrict a report to a specific counterparty’s data.
Filters use fields from the selected datasource(s).
- Add Rule: Add a filtering condition.
- Add Group: Group rules together to combine "AND" and "OR" logic.
When multiple datasources are used, tabs allow filtering for each datasource separately.
Think of row filters like the process of building a filter expression in Excel, where you can combine checks on data in each row to selectively filter the data into the final report. See here to play with an intractable example of the filter builder, and here for an explanation of how to do date filters (e.g. TODAY, YESTERDAY).
Column visibility
Choose which columns to include in the final report.
- Use the checkbox beside each field to mark it as included.
- By default, all columns are selected except Record ID and Timestamp (which are typically internal fields).
Unselected fields will not appear in the report output.
Formatting
Visible data fields can optionally have a format set in this section. This helps especially where there is no template defined which could add it's own formatting, for example a simple csv report.
Currently only DATE and DATE_TIME fields may be formatted. Where they are left unformatted the epoch timestamp (which isn't human readable, but is the format in which these fields are stored) will be included in the report.
Please note that fields set with a format will be served as a String to any templated reports as opposed to the field's true data type.
Column renames / aliases
The name of this step changes depending on your report configuration. Column renames when not using a template, and Column aliases when a template is selected.
This page controls how columns are labeled in the output:
- Use the checkboxes to select fields to rename / create a new alias for.
- Set a Display Name for each selected column.
For templated reports, for any columns selected in this section you must use the column alias name you have set here in your template, not the original field name.
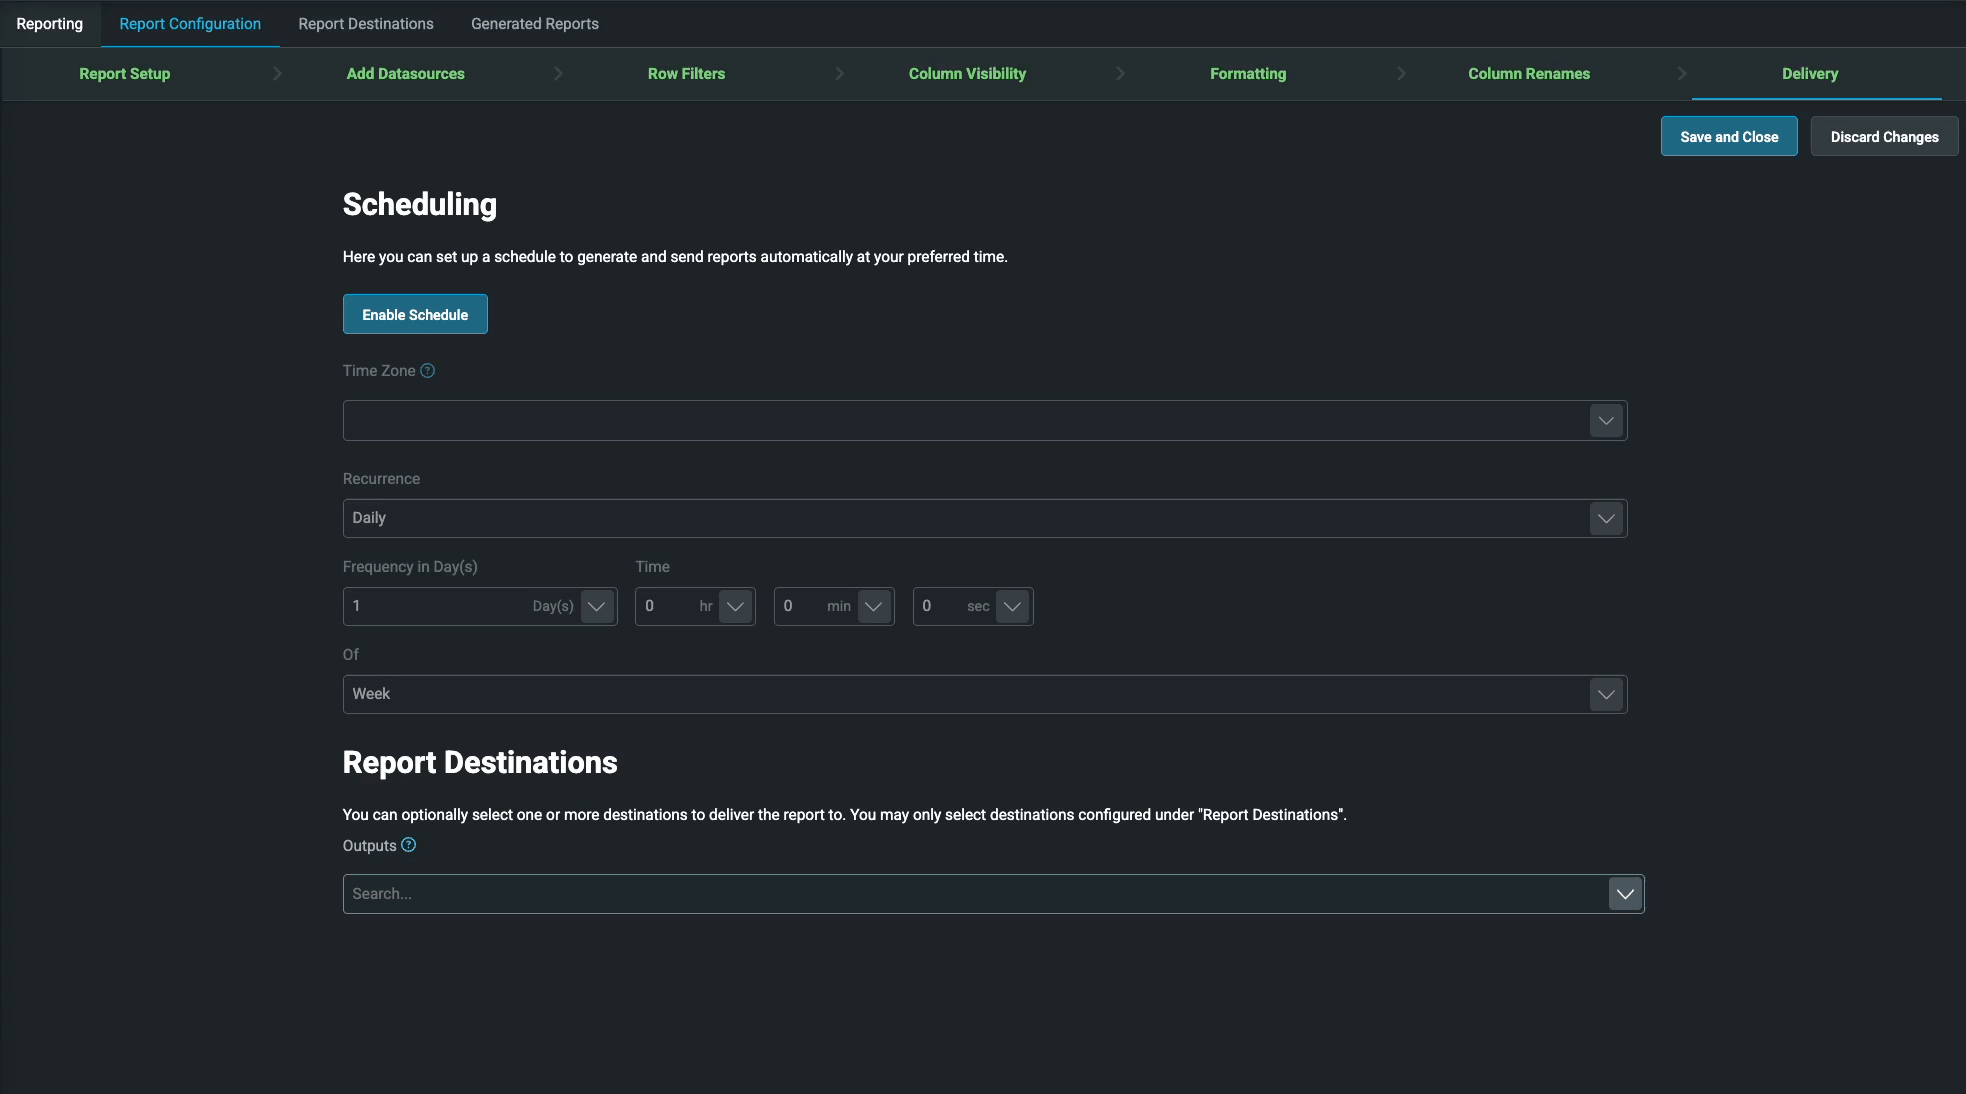
Delivery
Schedule automated report generation here.
Configure the timing and timezone for report runs. More information on recurrence types is available here.

You can also select delivery destinations (configured under Report destinations).
Multiple destinations can be selected for broader distribution. See the Report destinations section for more details.
Report destinations
This screen manages available destinations for report distribution.

Current distribution options:
- Email routes: Sends the report by email based on the route configuration.
- Screen routes: Triggers a screen notification when a report is generated.
Report distribution uses Genesis Notify, and only routes configured there are available for selection.
Destinations listed here become selectable in the delivery section of report configuration:
Generated reports
This screen lists all generated reports.
Each entry includes:
- The generation time.
- The status (success/failure).
- If failed, the reason for failure.
You can download or delete generated reports from this page.
Reports are also accessible in the Document Manager under the same hierarchy as when the report was run.