Component testing
There are three easy ways of testing components in your application:
- using the Genesis Console
- using an API client
- using the
curltool from the command line
Before you start
Before you start, make sure your server is running. Then run mon to check that your particular component’s process is running. For example, if you want to test one or more requestReply codeblocks (i.e. resources) in your Request Server, check that the application_REQUEST_SERVER process is running.
For any testing, you need to know:
- the IP address of name of your server
- the user name and password that will enable you to login and authenticate yourself
Testing with Genesis Console
For users who have Console, the easiest way to check a component is to log into the server and subscribe to the relevant Data Server via the Resources page. You need to know the server address and have a valid user name and password.
- In your browser, go to http://genesislcap.com/console/console-next2/.
- Enter the IP address of your server.
- Log in with your user name and password.
- Click on the RESOURCES tab.
- Filter the type to show only the relevant component, for example Event Handlers.
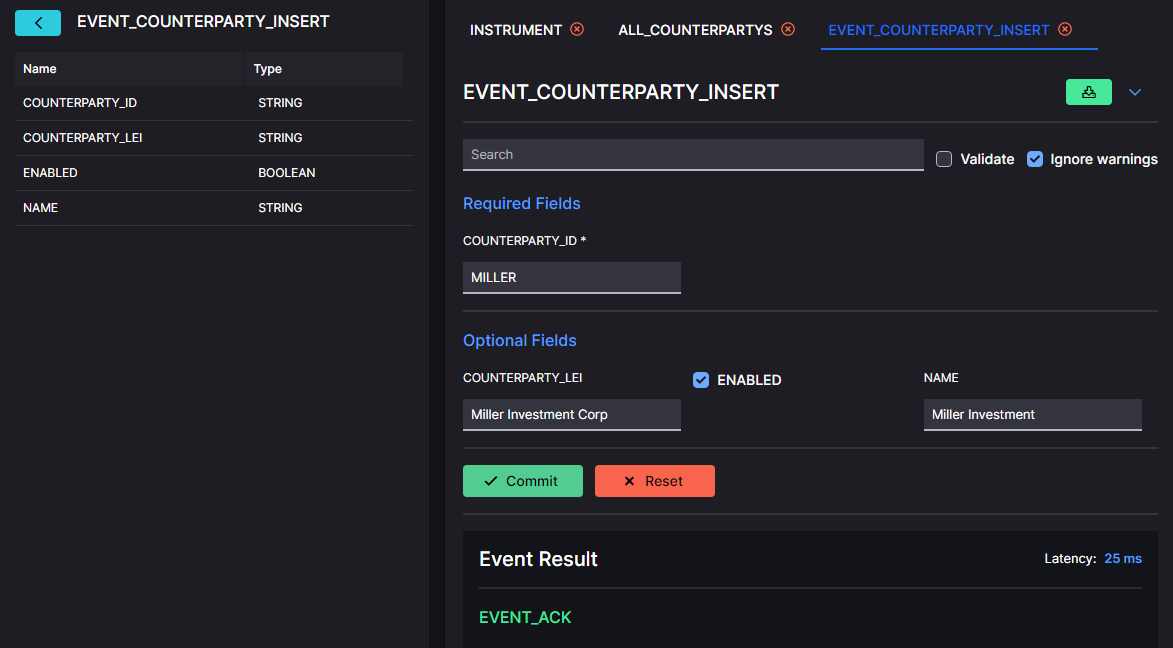
In the example below, we are testing the ability of the Event Handler EVENT_COUNTERPARTY_INSERT to insert a row of data to the table ALL_COUNTERPARTYS. The four fields in the table are listed on the left. On the right, we have supplied values for the four fields. Then you can click on COMMIT to send the insert. A successful insert displays an ACK message.
Using an API client
This type of software offers an easy way of testing each of your resources.
Two clients that Genesis uses for component testing are:
Broadly speaking, Postman offers more features, but Insomnia is also good and is simpler to use.
Logging on
Whichever client you are using, you need to log in before you can send test requests to the server. This involves two things:
- providing a SOURCE_REF - this can be any string that identifies all your activity while you are logged in
- retrieving a SESSION_AUTH_TOKEN, which you can copy and use to authorise all your test requests
For example, to login using Insomnia:
- Create a new query in Insomnia.
- In front of the url, set the call to POST.
- For the url, you need to supply your server instance, then :9064 (in order to send you to the application's Router), and then event-login-auth. For example: https://test-mynewapp:9064/event-login-auth
- Set the Body to JSON and insert the message below (substituting your correct user name and password) in the main body.
{
    "MESSAGE_TYPE": "TXN_LOGIN_AUTH",
    "SERVICE_NAME": "AUTH_MANAGER",
    "DETAILS": {
        "USER_NAME": "DonJuan",
        "PASSWORD": "2BisTODO"
    }
}
- Click to view the header, then insert SOURCE_REF in the header. For this field, you can use any string that will identify you (in effect). In the example below, we have set SOURCE_REF to BAUDOIN1 (for no particular reason).
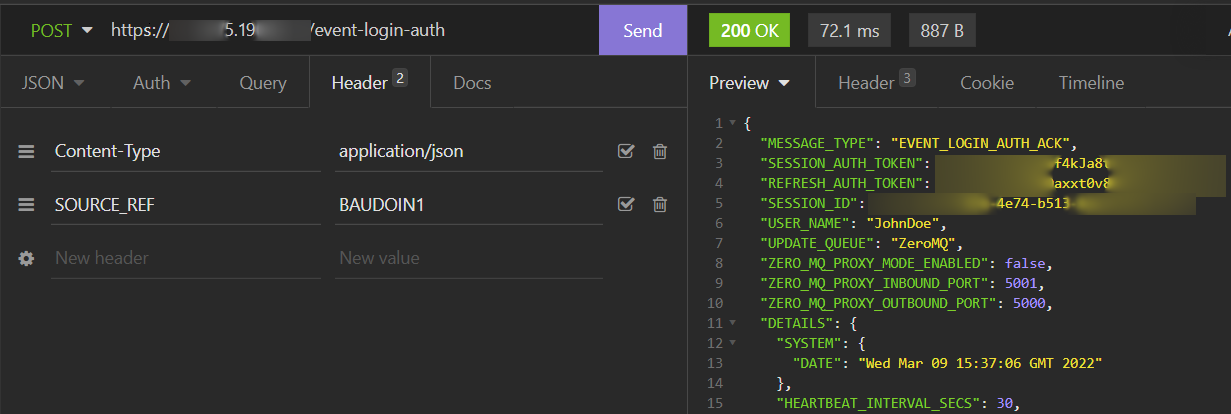
- When you have done this, click on the Send button.
This returns a set of details in the right side of the Insomnia window, where you can copy the SESSION_AUTH_TOKEN, which you will need for your test requests.
Testing with curl
You can use the curl tool to test a module from the command line.
The simple example below tests the resource event-account-validate-request. It sends a request to see if this resource in the Event Handler is able to validate an account.
curl --request POST 'localhost:9064/event-account-validate-request' \
--header 'SOURCE_REF: 1' \
--header "SESSION_AUTH_TOKEN: $1" \
--header 'Content-Type: application/json' \
-d '{"DETAILS": {"ACCOUNT_ID" : 9 }}'
Now let's look more closely at that.
-
At the beginning, we use the
--requestparameter, which specifies a custom request, followed by POST to indicate that we are posting data to the resource. The data itself comes later (in the-dparameter). -
The resource that you are accessing must be part of the URL. In this case, the resource is
event-account-validate-request. (Remember that the events you specify are transformed when you generate the objects. for example, EVENT_NAME becomes event-name.) -
Three
--headerparameters have been specified:-
The first header,
SOURCE_REF, uniquely identifies your message. In our example, this is simply 1. -
The
SESSION_AUTH_TOKENis required because, as is usually the case, the resource is non-public; you need to be logged in for access. -
The
Content-Type ...header indicates the media type of the content you are requesting - for example JSON or a png file. This tells the server how to deal with your message. You can find more about content type in html online.
-
-
The
-dparameter specifies the input for the resource. The request itself is always JSON and should always be contained in theDETAILStag. In this case, we are requesting to validate account id 9.
Now here is a more complex example, which tests the ability to upsert to an eventHandler resource called event-upsert-inventory.
curl --request POST 'myserver-dev-fictional/ws/event-upsert-inventory' \
--header 'SOURCE_REF: 15' \
--header 'Content-Type: application/json' \
--header 'SESSION_AUTH_TOKEN: SnpTI4dvX9gcXDd4BQlOTkp4JSCrXR3t' \
--data-raw '{
    "MESSAGE_TYPE": "EVENT_UPSERT_INVENTORY",
    "SERVICE_NAME":"FOXTROT_EVENT_HANDLER",
    "DETAILS":{
        "INSTRUMENT_ID": "8200",
        "INSTRUMENT_ID_TYPE": "FOXTROT_ID",
        "UNIT_OFFER_PRICE":"102.55",
        "UNIT_OFFER_SIZE": "1000000",
        "UNIT_BID_PRICE":"100",
        "UNIT_BID_SIZE": "2000000",
        "PARTIAL_BID_ALLOWED": "TRUE",
        "PARTIAL_OFFER_ALLOWED": "TRUE",
        "IOI_ID" : "12345",
        "TRADER_NAME" : "Ronald.Zappa@madeup.com"
    }
}'
Note that the data to be upserted is specified using the --data-raw parameter. This is because the set of fields is reasonably complicated, and it includes an email address - you don't want that @ character to trigger any unwanted processing.
You can find more details about curl parameters online.
The POSTMAN tool has a useful feature tucked away with the icons at the right of the screen. This enables you to translate automatically the query you have built into curl format (or a large number of others).
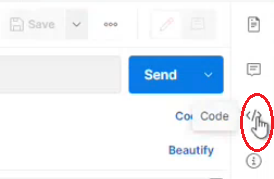
In the area displayed, just select cURL as the code, and the code for your current query is displayed below for you to copy.
